Wednesday, April 27, 2011

House Organizing Week 4- Laundry Room

I know that I haven't done any organizing in a couple of months, but the spring has got me motivated to keep working on my New Years Resolution. This week I've been working on completely redoing my laundry room, so I figured I might as well reorganize everything when I put it all back together.

I reorganized the first cabinet so all towels and sheets that my great uncle might need in the future are on the top shelf. The middle shelve has rags on the left and tubs on the right is a tube full of toilet paper rolls that I'm saving for a project (you can see them in the unorganized picture on the bottom shelf). This cabinet is right above the washing machine, so I put all the detergents, bleach, and stain removers within easy reach on the bottom shelf.


The middle cabinet has empty room in it now. I went through and organized all my cleaning products and through away empty bottles. All of my home cleaners go in this cabinet to keep them in one place and out of easy reach from children.  The bucket did get put back on the top shelf after the picture was taken. On the middle shelf are all the paint samples that I tried for our house.


Before I decided to take before pictures I partially cleaned out the last cabinet. The only thing I took out before hand was a bunch of blankets and towels. This cabinet is over the dryer, so naturally the dryer sheets went on the bottom shelf. Before cleaning out the cabinet I had an empty dryer sheet box, as well as a box that I never used because I didn't like the smell. The empty box went to the garbage, and the unused box is going to a friend that will use it. Blankets and unused sheets are now folded and piled nicely on the top shelf. New Towels now have a clean shelf to sit on until I decide where to use them.


It is so nice to have organized cabinets that I know exactly what's in them. There is extra room which I'm sure won't last for long, but It will stay organized!

Tuesday, April 26, 2011

Laundry Room days 1-3

Last week we finally tackled our laundry room. We've had all the things we needed to complete the project for a couple of months now, but just never actually got around to doing it. I believe that this is the biggest project we've tackled so far, with the most components changed. The kitchen floor was a bigger area project, but with the laundry room we installed new flooring, a new toilet, a new sink, and painted. 

Parden the lighting in the following pictures. It's a rather small room with a horrible light and not very big windows making it hard to get the perfect lighting. The weather also wasn't cooperating, as it rained most of the week.


Day 1-2 Emptying and Cleaning
These pictures were taken just before we started pulling everything out. It wasn't hard for me to say good bye to that old vanity with a green counter, or the water hogging toilet. If you look carefully in the two pictures below you will notice that their is no toilet paper holder, requiring the roll to sit on the counter to be in easy reach.


The only thing I did with the cabinets was remove the doors so I could paint them. Almost everything inside was also removed so no paint could accidentally drop on it.


Those color tests have been on that wall for almost a year. You may recognize the green on the left as the color we used in the kitchen. We got two different greens to test to narrow down our options, and fell in love with both colors, so we picked two rooms to use them in.


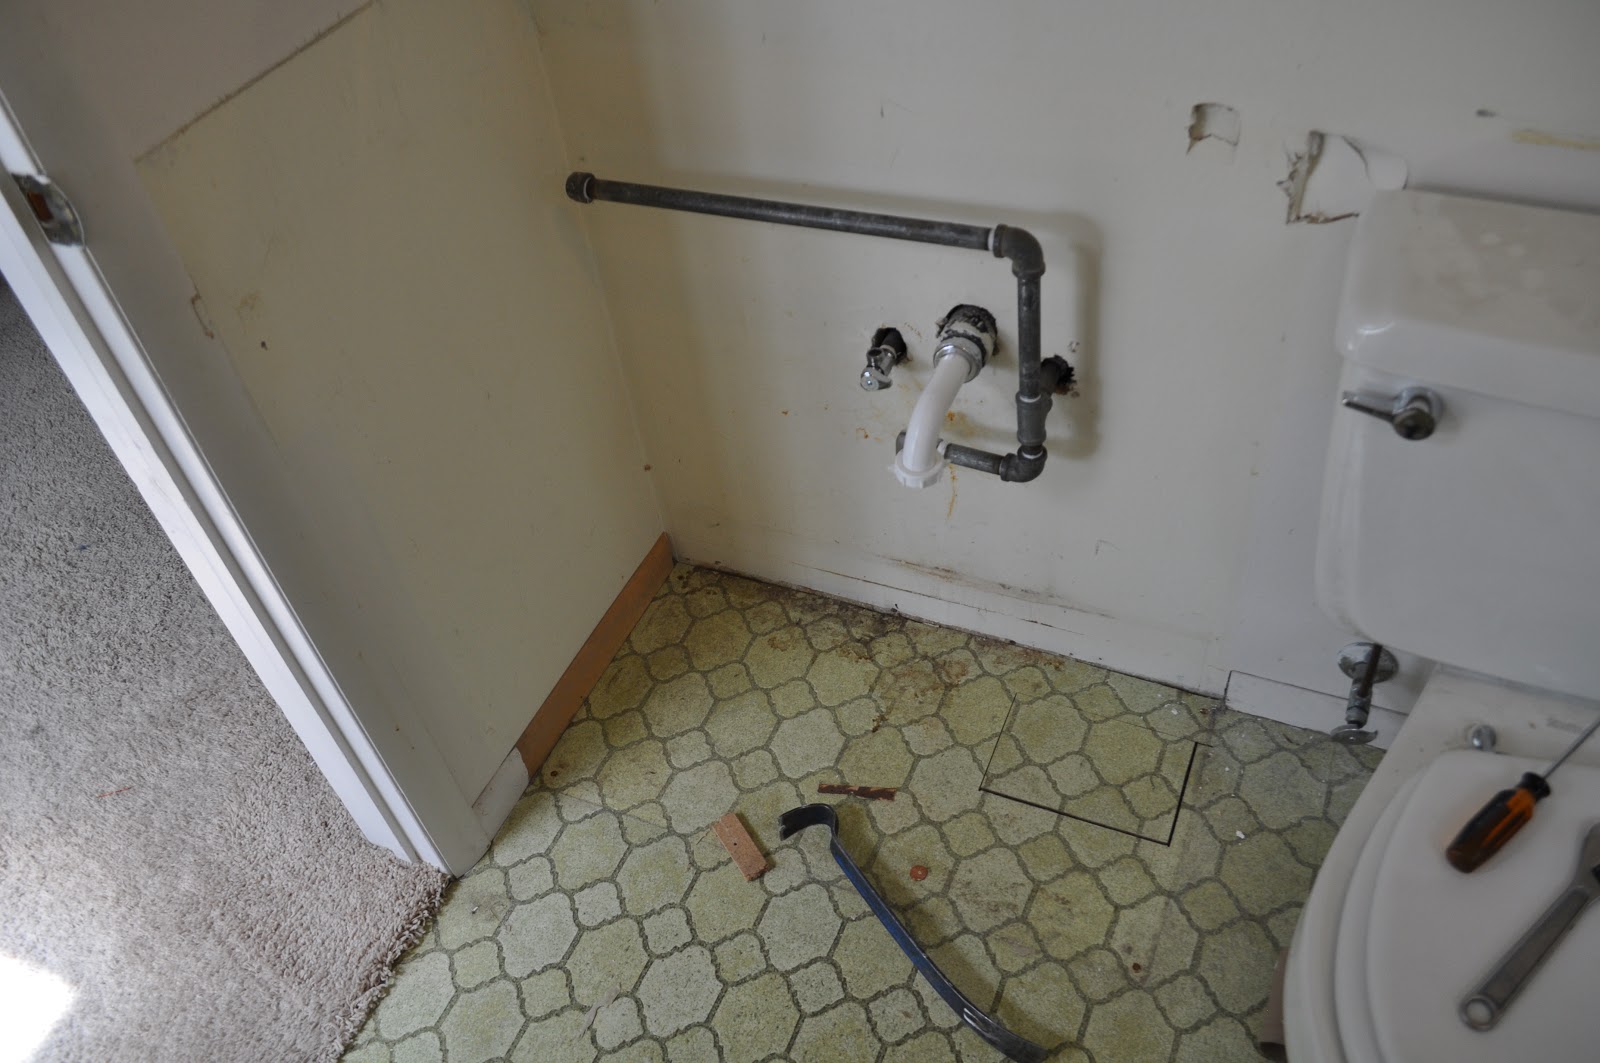
In the picture below you can see our "beautiful" yellowish greenish 1960's floor. Also in between our washer and drier we have a utility sink. I love the thought of having a utility sink, but this one has seen better days. It won't be leaving our house quite yet though, as we need to save for a new one...if we can even find one that's narrow enough to fit that space.


This is after we got the sink out and the washer out. You can now see what a horrible condition the utility sink is actually in.

While doing the sink we had our first casualties. My great uncle had installed the vanity himself, and it was attached to the wall and the counter top in weird ways. We made three holes in the wall trying to get them out. You can see two of the holes right next to each other. It didn't take much pressure to put a hole in the wall.


There was another hole not pictured above that was on the left side of the sink. It went straight through the Sheetrock to the other side, where there is shelving between the studs. At least the holes are really the only bad things to happen during the the process so far.


After emptying the whole room it was time to clean the whole room. That took a day in it's self! The worst part was behind the washer and dryer, which was dirty and had peeling paint. The rest of the room had been repainted at some point, but I don't think behind there had been painted since the room was built in around the late 60's early 70's. 


Day 3-Priming
It was a long day of priming, followed by painting in the evening (not pictured in the post). Here are the cabinet doors getting a layer of primer. They got two coats of paint as well to make them actually look white. I also painted the door to the room so the whites would match.

Here you can see the whole room painted, as well as a glimps of the painted cabinets. The room looks better all ready. The hole in the wall at the far end of the room is where the wall mounted ironing board goes.


I patched the holes around the sink, you can't see them in this picture, but I'm no pro so you can see them in real life. The vanity will cover some of them, and someday we'll install a back splash to cover the rest. I decided to leave the mirror in the room. I didn't want to try removing it from the wall, even though it's not my first pick for a mirror.


We haven't quite got everything put back together yet, though we're getting close to finishing. It'll all be done by the end of this week, so watch for a post about the finished product later this week.


I'm linking to these parties
Remodelaholic

Saturday, April 23, 2011

Birthday Baking

Everyone says that you're not supposed to bake your own birthday cake, but I've been always wanted to make a layered cake, so I took the opportunity to make one. I actually made the cake for my niece as well that was sharing a birthday party with me. Dinner took longer to make then I planned on, so I only had about 10 min to put the cake together and decorate it. It was fun to do though.


Thursday, April 21, 2011

First Spray Painting Fun

Last year there was a hobby store that was going out of business, so I went to their sale and bought a whole bunch of spray paint for about $1 a can. It was finally warm enough a couple of weeks ago to go outside and put the spray paint to good use. For my first spray painting project I decided to paint something that I already had that I didn't really care if I ruined it. I chose a pink clock that was in the bathroom when we moved in. It's stayed in the bathroom, but it doesn't fit my new color scheme of brown and blue. As I looked through the spray paint I had I decided to paint it brown.

I forgot to take a before picture, but you can see it in the picture of the bathroom.

Here it is with it's new color. I also made a new face for it on some fun blue scrap paper. The face used to be gold with sunburst as decoration.


It was a fun project, and I love the new look of the clock!

Tuesday, April 19, 2011

Painted Bathroom

During the last year we've done a number of things to update/beautify our bathroom. This is what our bathroom looked like when we moved in. It was an overload of pink. I talk about our quick fix in Quick New Bathroom post.


To begin with early last summer my dad and husband installed a ceiling fan! Previously there was no fan in the bathroom, and man did the moisture make the walls dirty fast. I opted for a fan with a light to help the shower not be so dark at night.

Later in the summer I primed and painted the bathroom. Man was that an experience. It was the first room I had ever painted in my life, and not the best room to start with. There are so many little nooks and crannies to work around.  I am not quite finished with the painting, though the rest will have to wait until later. I'll be painting all of the doors in the house eventually, so I'll paint the door moldings then as well. 


After the painting came a new light fixture. Goodbye to the 60s. I'm so grateful that the boxed, glittery, gold light fixture is gone! At the same time I also updated the knobs on the vanity to match the light fixtures and curtain rod. Someday I'll replace the rest of the gold hardware on the vanity, but it will do for now. To the right you can see the old ugly light.


Old gold knobs
New knobs
The most recent thing we did was to install a beautiful new water saving toilet. The ugly pink toilet is gone forever (now to just get rid of the pink sinks, and tub). Besides the wonderfulness of the new toilet being white it's nice to know that we're saving water as well. (I know I still need to take the tag off the toilet...well I'll have my hubby do it because I HATE stickers).


It's so nice to have so much done in the bathroom it looks so different from what it did a year ago. I still have more plans for it like: curtains, wall decor, new vanity top/sinks/faucets and possibly tub, and someday new flooring, but I can live with it for now and not be overloaded with pink.